

How to create a custom refresh image
How to create a custom
refresh image in Windows 8
Windows 8 has the ability to reset your
installation to factory defaults or to refresh your installation
while retaining your data and settings. By default, when you perform
a refresh in Windows 8, the operating system will restore Windows
back to a fresh state where you retain your personal data and
settings, but will have to install all of your applications again.
If you have installed a lot of applications, or do not have all the
necessary installation disks, it can be an annoying and lengthy task
to get your computer back up and running. This is where a new and
useful feature saves the day. A program called recimg.exe allows you
to create a custom refresh image that you can set to be used when
you perform a refresh in Windows 8. This image will be a snapshot of
the current state of Windows 8 and will include all applications
that are currently installed on your computer. This allows you to
create snapshots of Windows 8 over time and store them so that you
can easily restore Windows 8 to various states if you run into an
issue. The best part is that all applications that are installed
when you create the custom image will still be there after you
perform a refresh.
When you use recimg.exe to create a custom
refresh image it will always save the image as CustomRefresh.wim and
overwrite any existing images located in the same folder. Therefore,
it is suggested that you create a separate folder for each custom
refresh images that you may want to revert back to. I suggest you
create a folder called C:\custom-refresh, but it can be whatever
name you like, which will be the base folder that you store all of
your snapshot folders. Whenever you create a new refresh image, you
would then specify another folder under the C:\custom-refresh folder
that uses the current date or some other useful indicator as the
subfolder name.
As an
example, if I was going to create an image today, I would specify
that I want to save it to the C:\custom-refresh\04-05-13 folder.
Recimg would then automatically make the subfolder for us and create
the image in it. You can then create a text file in each snapshots
folder that contains information about what major apps are installed
or the current state of Windows.
Note:
These images can be very large, with sizes being over 20GB for each
image. Therefore be sure to save them on a drive that has plenty of
free space available.
When
you have decided where you want to store the images and are ready to
create a custom refresh image we need to open an elevated command
prompt in Windows 8. To open an elevated command prompt, use the
Windows+X keyboard combination ( + ) to open the Power User Tasks
menu.
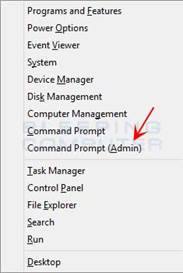
When the menu is open click on the Command
Prompt (Admin) menu option.
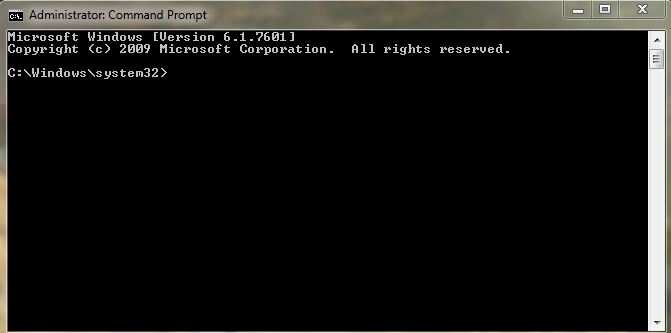
You will now see an elevated command prompt as shown below.
To create a custom refresh image using the
current state of your Windows 8 installation you would use the
recimg.exe program with the following syntax:
From
the command prompt type the following
recimg.exe /createimage C:\RefreshImage
Using
this syntax, if we wanted to create a new refresh image and save it
to the C:\RefreshImage\04-05-13
I would
use the following command:
recimg.exe
/createimage C:\RefreshImage\04-05-13
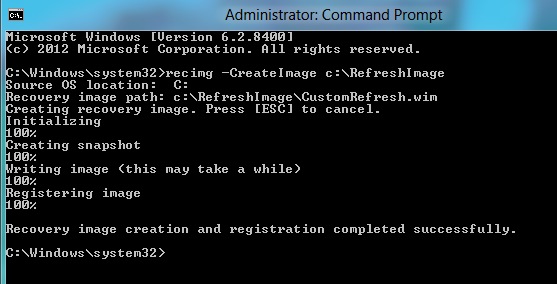
When the image has finished being created you
will be back at the command prompt and the screen will look similar
to below.
If there were no error messages, you will now
see that there is a file called CustomRefresh.wim inside the folder
you specified. This is the custom refresh image that you just
created. When you create a custom refresh image using the above
process, Windows will automatically register that image as the
default one to use when you perform a refresh. This means that you
do not have to do anything else to have Windows 8 use this image
going forward.
You can confirm that this image is now the
default refresh image by typing recimg.exe /showcurrent at the
command prompt. This command will list the current image that will
be used for a Windows 8 refresh.
Finally, if you have multiple images it is also
possible to specify which image you want to use as your default
refresh image. To do this you would use the following command
syntax:
recimg.exe
/setcurrent C:\RefreshImage
(to go back to the last or another image) you would type
recimg.exe /setcuurent C:\RefreshImage\04-05-13
(C:\foldername\subfoldername)
Note: When using /setcurrent, you should only
specify the path to the folder that contains the image you want to
use. You should not include the image name itself as part of the
argument.
Once
you type the command and press Enter on your keyboard, the custom
refresh image that is stored in the specified folder will now become
the current refresh image. If the image is assigned properly, the
command will display the message: RecImg: Operation completed
successfully.