

How to create a system image
What you need
Creating a System
Image
As I mentioned, in order to use the System Image Recovery tool you
must have created a system image of your hard disk. As such, I’ll
begin by walking you through the steps required to create a system
image.
To create a system image in Windows 8, you’ll start by accessing the
oddly named Windows 7 File Recovery window. (Why not just
call it File Recovery or Windows Backup and leave it at that?) To do
so, use the [Windows] + W keystroke to access the Search Settings
page. Then, type Windows 7 File in the text box and click Windows 7
File Recovery, as shown in Figure A.
Figure A
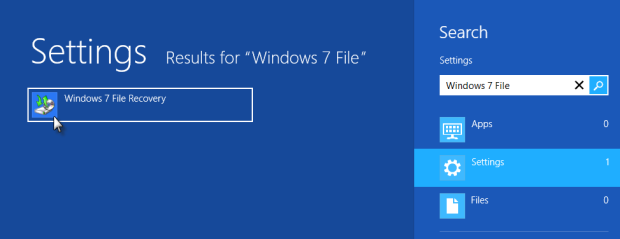
Accessing the Windows
7 File Recovery tool from the Start screen is easy.
In a moment, you see the Windows 7 File Recovery user interface and
you should select the Create a system image command on the left side
of the screen to launch the creation tool. On the first screen you
will need to choose where you are going to create a system image.
For my example, I am going to create the system image on a set of
DVD+R discs in the DVD RW drive, as illustrated in Figure B.
Figure B
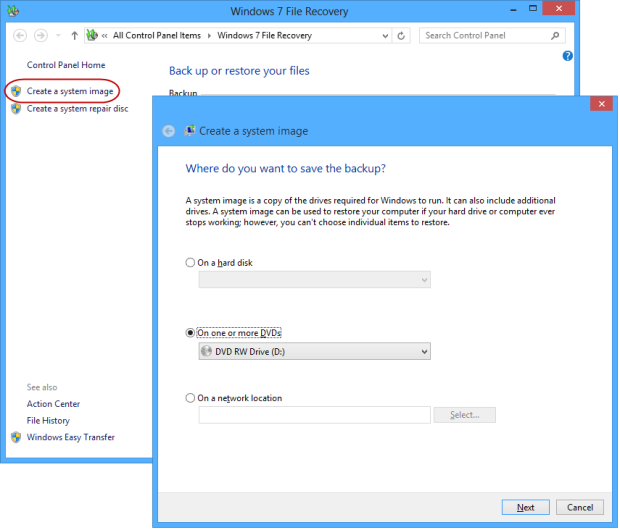
On my test system,
I’ll create the system image on a set of DVD+R discs.
When you click Next, you will be prompted to confirm your backup
settings, as shown in Figure C. As you can see, in addition
to the main partition, the System Reserved partition is also
selected to be backed up. On my test system, which is pretty bare
bones at this point, the system is indicating that the image will
take up 36GB of space. (When the operation was complete, the system
image, with compression, only required three 4.7GB DVD+R discs.)
When you are ready, just click the Start backup button.
Figure C
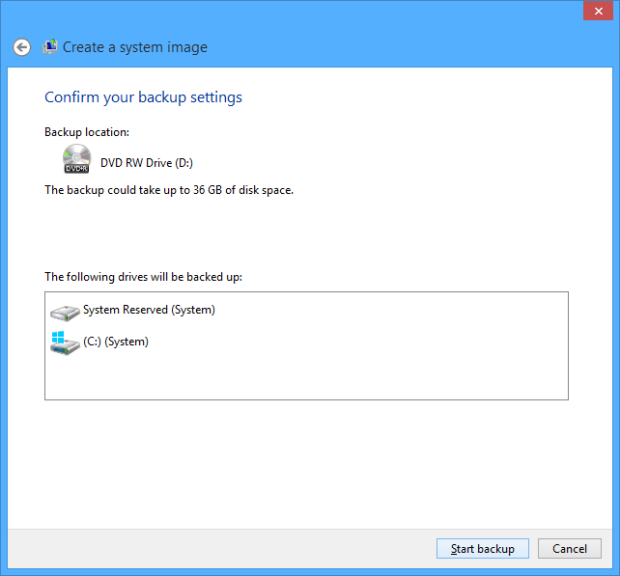
On the Confirm your
backup setting page take a look at the information presented and
then click the Start backup button.
As Windows begins preparing for the operation, it will prompt you to
label and then insert the first DVD disc This process is illustrated
in Figure D.
Figure D
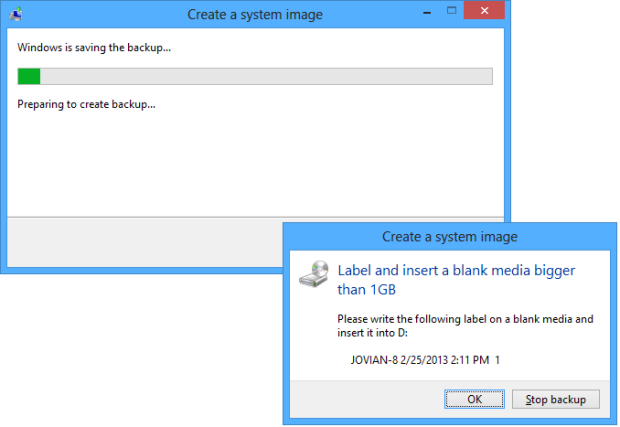
To get started, insert
the first disc and click OK.
Once you insert the blank disc, you’ll be prompted to format it.
Make sure that you select the Don’t ask me again for this backup
check box before you click the Format button. The operation will
then format the optical media, as shown in Figure E.
Figure E
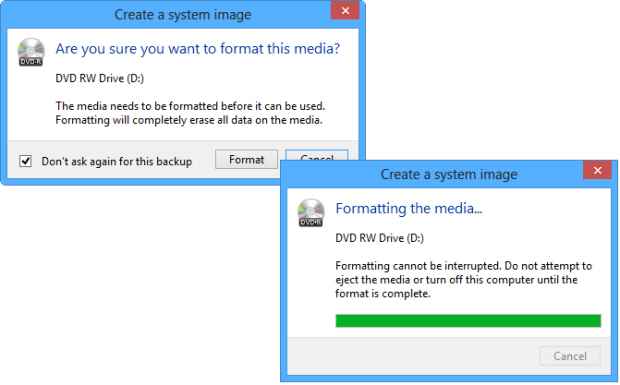
Make sure that you
select the Don’t ask me again for this backup check box.
As the backup operation gets under way, you’ll see progress
indicators letting you know the status of the operation, which
includes verification of the media once the backup portion is
complete. After each disc is verified, you’ll be prompted to insert
a new disc. This process is illustrated in Figure F.
Figure F
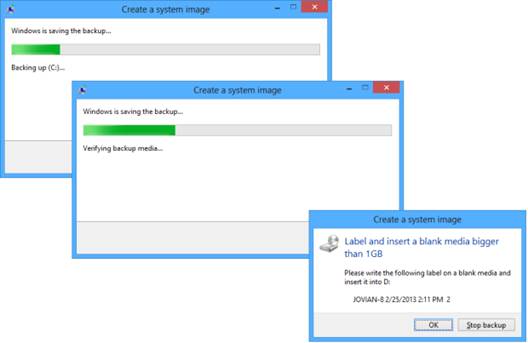
Creating a System
Image on DVDs includes a verification operation.
When the System Image creation procedure is complete, you’ll be
prompted to create a System Repair disc, as shown in Figure G.
However, as you may remember, a System Repair disc is the same as
the Recovery Drive and if you have already
created a Recovery
Drive, you
can just click No and you will be notified that the backup completed
successfully.
Figure G
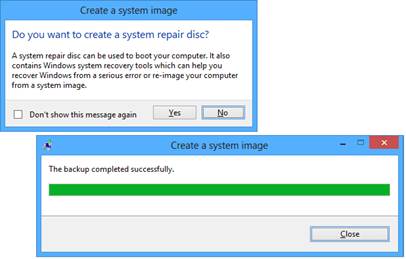
In Windows 8, the
System Repair disc is the same as the Recovery Drive.

COM-TEK
Serving Laramie since 1995

Laramie Chamber of Commerce

Official Site for the
City of Laramie
www.ci.laramie.wy.us